


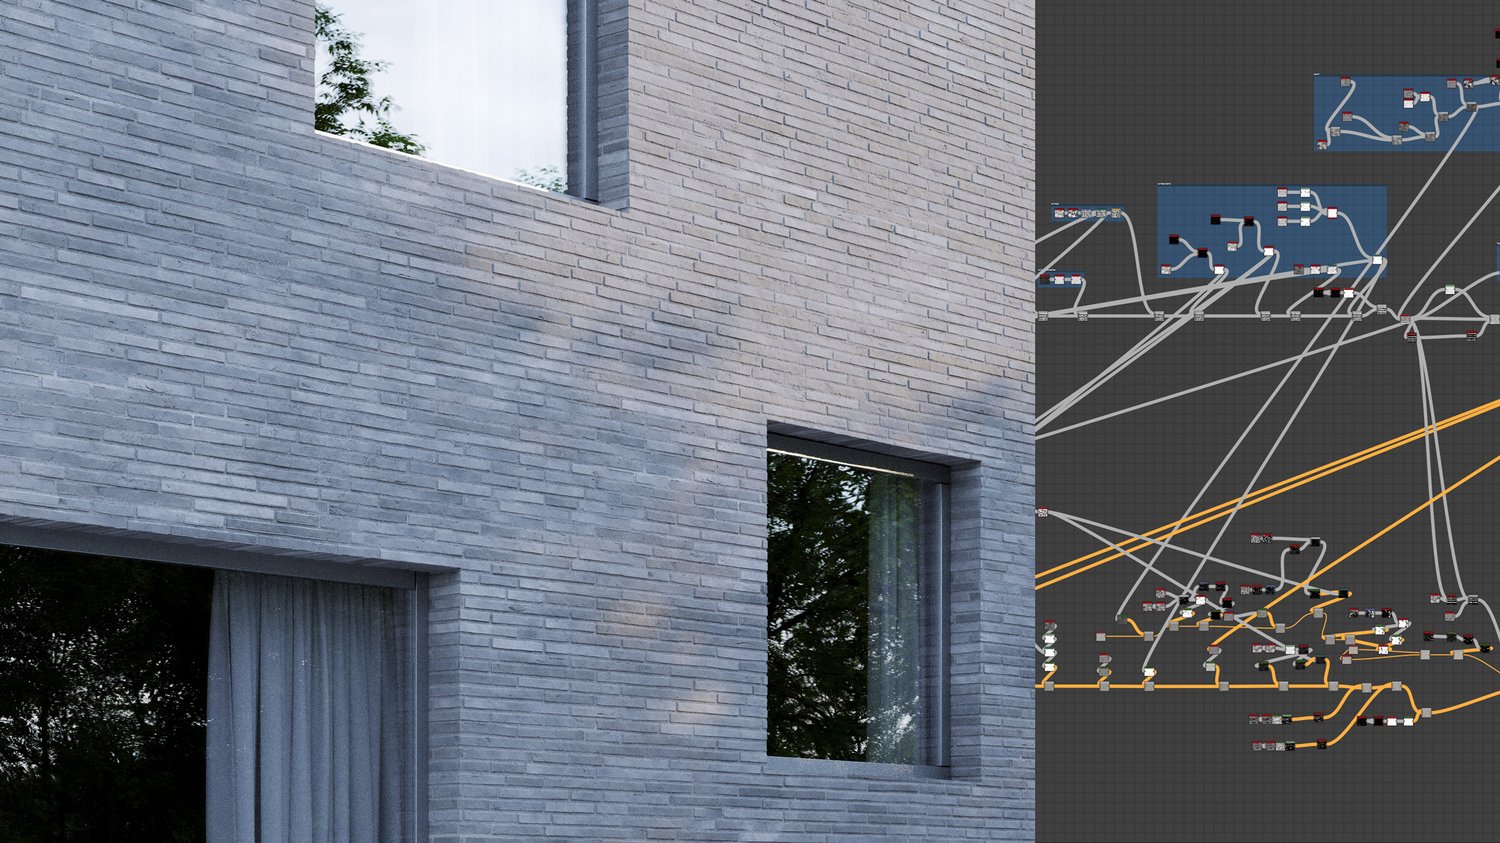
How to start?
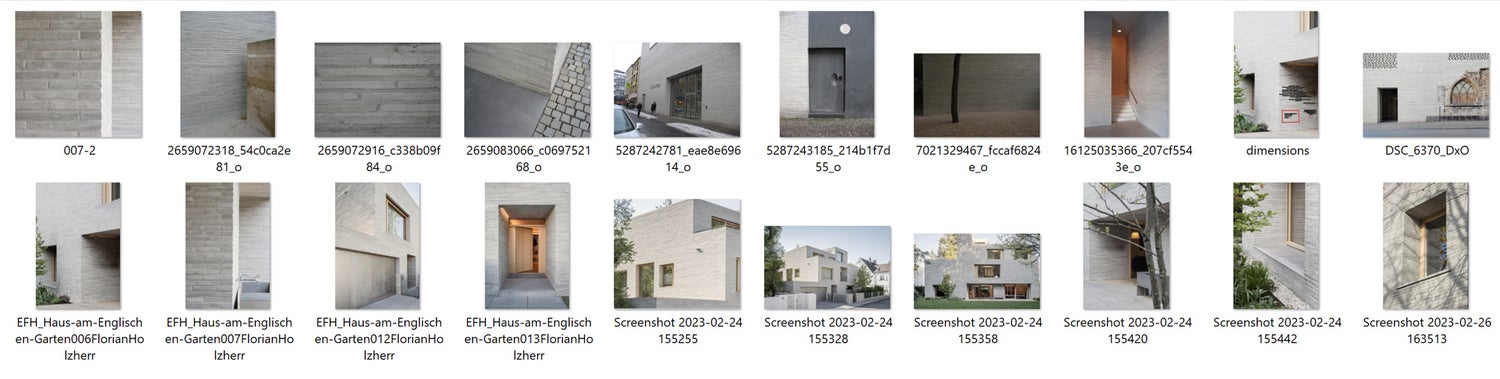
The first and most important step in creating a PBR Brick Texture with substance designer is to find as much reference as possible. I was using a specific reference called Haus am englischen Garten by Baumstark Bielmeier Architekten and Axel Baudendistel, to recreate K51 brick by Petersen Tegl. This Kolumba color and execution style I like the most, it is similar to Kolumba museum by Peter zumthor. Therefore I tried to find lots of photos that show the brick in different lighting scenarios and angles. The sunny images are useful to analyse the height of the bricks. Close up photos are useful to check out smaller surface details and the color distribution for each brick.
But first things first. I want to find out more about the bricks dimensions. The standard size for a Kolumba brick is 528 x 108 x 37 mm, but it’s also possible to order special measurements at Petersen tegl. For the project I chose this has obviously been the case, since the bricks do vary in length. I also want to implement that in the texture. I think it looks more interesting than having just one length.

As you can see there is 4 different brick-length. The biggest one, probably the Kolumba standard size of 52,8 cm. Then we have a brick that is half the size and one brick that is two-thirds and a one-third sized brick. To define the shape/length will be the first thing that we are setting up in substance designer.
There is always many ways to reach your goal. This applies also to setting up materials in substance designer. There is no correct way of doing things. That makes it very interesting but can be intimidating at the same time when you first start working with substance designer because there is no guideline for everything. I want to encourage you to stick to substance designer or if you haven't already - to start using it for creating your own materials. It is a very powerful tool and even if it looks intimidating at first when you see these huge node-trees at first, its very logical if you set up your material step-by-step. It just takes some practice.
Base shape
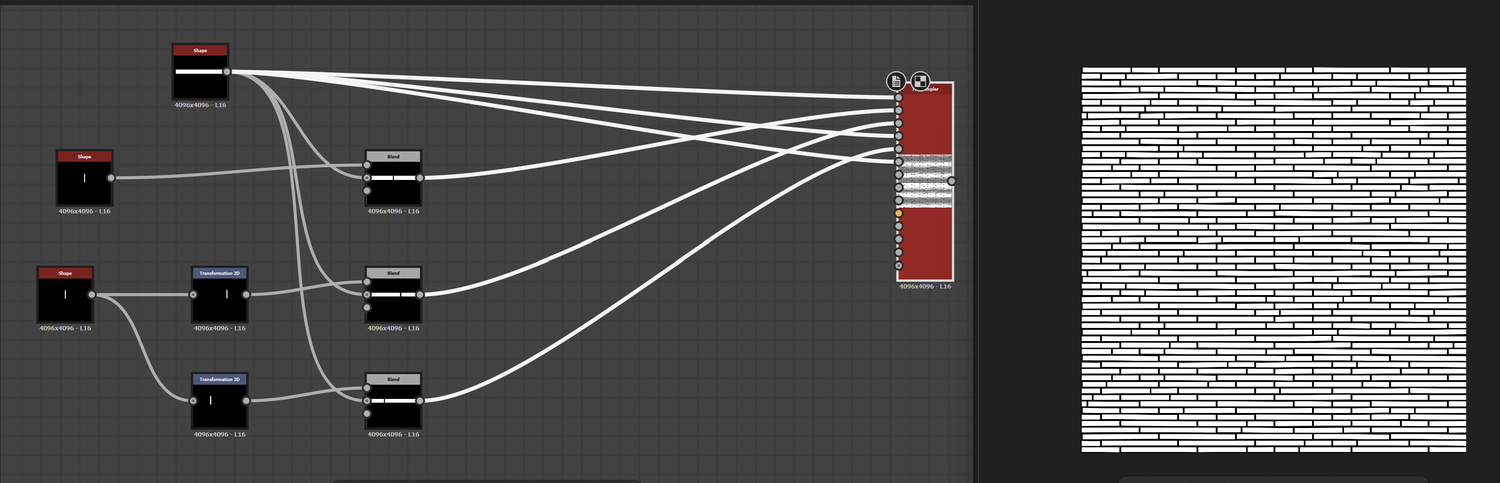
In the screenshot above you can see the very base shape setup and the output of the tile sampler. I started with one shape [the biggest brick] and divided it the way we already analyzed in the reference. This way we have one large shaped brick, one divided in the middle which makes two half sized bricks. And two two-thirds sized bricks [to get more variation its two]. Everything gets put together in a tile samper. Now we have set up the bond like in the reference. This is a good starting point for our height map. But it is way to accurate as it is now. We want to implement imperfection to make it look real.

As a next step i wanted to recreate another feature of the Kolumba brick. Some of the bricks are distorted a bit. You can use a warp in combination with a perlin noise to warp your pattern. But i ran into a problem applying this on the pattern as a whole because this warps all the bricks together and doesn't look real. That is why i used a flood-fill node in combination with a histogram select node to isolate certain brick that i want to warp. So i had to subtract the isolated bricks from the pattern first, and then add the warped ones on top. This way we have warped bricks next to straight bricks, and it looks much more like the reference.

In the next step i created a flood-fill node and put it into a flood-fill to gradient node. This way we can add more variety to the overall appearance of the pattern. You have to remember that the white parts in our height map are extruded the most, while the darker parts are kind of flat. A random grayscale node results in brick-faces that have some variation and are not perfectly flat.
Edge-wear
Another thing that adds more realism to materials are edge-wear effects. If you check the edges of a brick it is never perfectly straight. It has some subtle imperfections that we can recreate with a specific node called slope blur.
In this setup above you can see my base setup for edgewear effects. You chain your pattern output to a slope blur grayscale input, for the slope input you can experiment with different noises. I used clouds 2 in combination with a histogram scan. As a mask [so that the effect is not everywhere] i was using a simple perlin noise. For the slope blur, you should work with very small intensity parameters to achieve similar effects.
For presentation purposes and to keep it simple I am showing you the basic methods like the edge wear aka slope blur node here or directional warp node [next step]. To achieve realistic results it is crucial that you don't just leave it there. In the further process I was blending multiple slope blur nodes together with different slope inputs and intensity values. This way, by blending multiple effects on top of each other you achieve realistic effects. The key here is to use multiple effects but use them very subtle.
Surface imperfections
In the next step we will add surface imperfections. If we look back at our reference we can see that the flat surface of a brick is not really flat. There is so much little dents, cracks etc. defining the surface of the brick and make it look alive. That is what we want to simulate with different noises, grunge maps etc. We run into the known problem again, if we want to apply those effects on the pattern as a whole. That is why we need some step in between to distribute the noise for each individual brick - we need to randomize it.
At this point the directional warp node comes in handy. You can see in the image below that the clouds 2 node is being distributed randomly by the directional warp that is fed with a flood fill to random grayscale node. What happens is that for each grayscale value [brick] the clouds 2 node is changing its position.

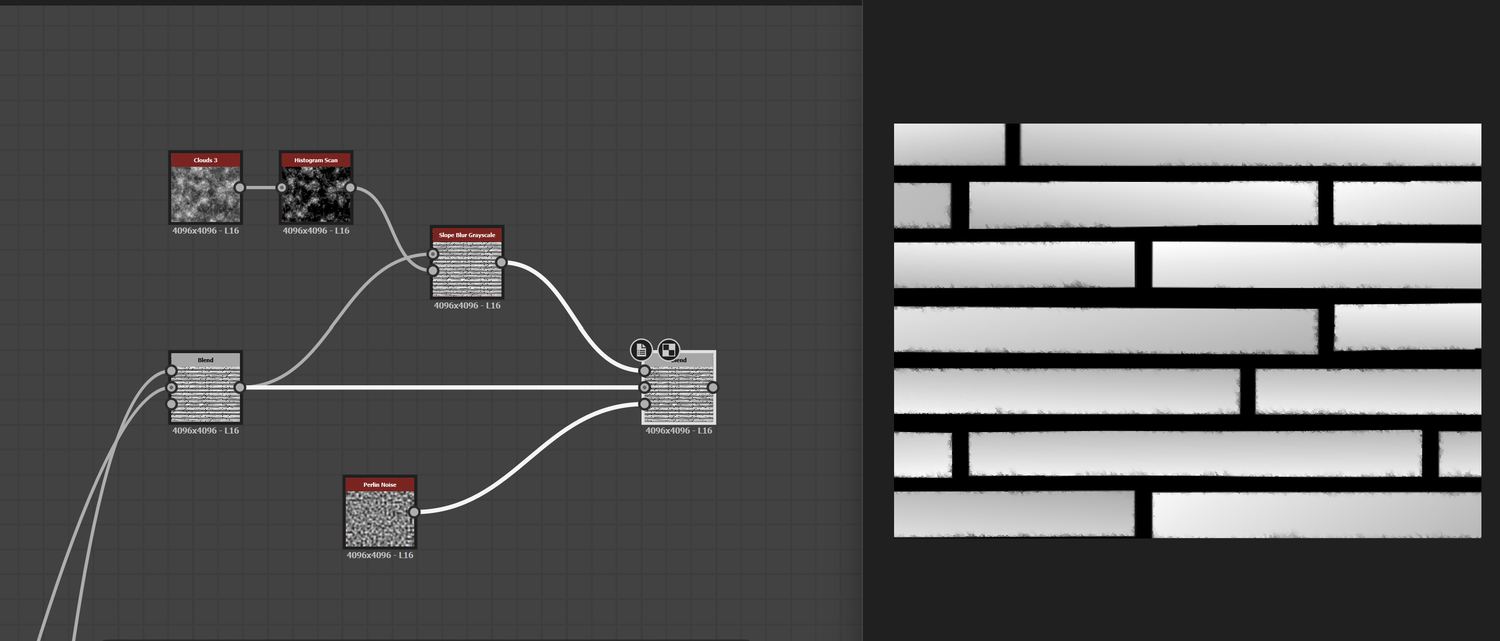
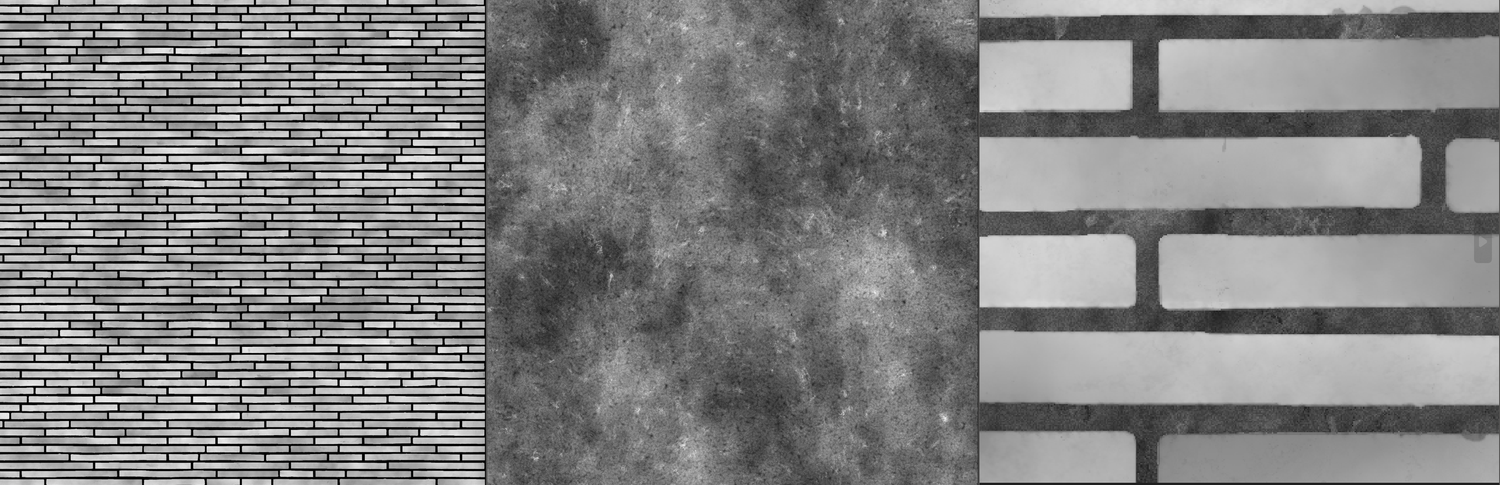
Grout
We created a base pattern [bond] so far, implemented warped single bricks, added edge wear effects and surface imperfections. Now we need to create a grout map that we can blend with our bricks. In the image below you can see our finished bricks on the left, the grout texture in the middle, and the blended nodes [via height blend]. Below you can see the result of our finished height map in the 3D view.


In the next blog article I want to talk about setting up the base color, normal and roughness map.
Cheers,
Nicolai
Comments ()